

A lot of 350z owners will find themselves desiring better braking performance, either because they are the occasional track junkie, weekend warrior — or just want the peace of mind of having a great performing setup for their daily use.
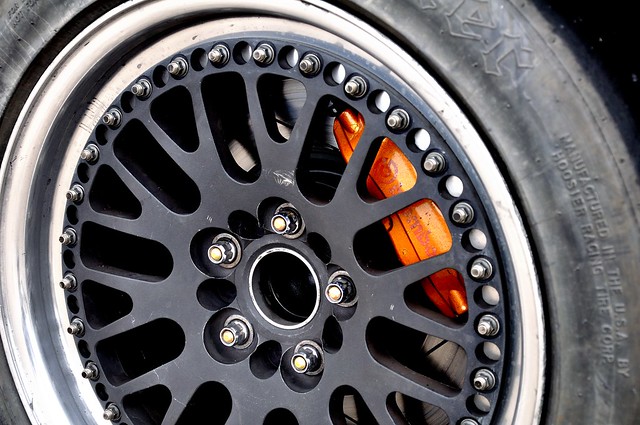
There are many, many aftermarket options for big brake kits, however the OEM Brembo kit that came on the 350z track editions is a great setup. Finding a set lightly used can be relatively cheap ($1000-$1500 for all 4 wheels commonly).
I will go over a bit briefly about the process and what you will need to upgrade your basic brakes on your Z to the OEM Brembo kit. It is ALMOST bolt-on, but lets go over it now.
Tools you will need:
- Basic ratchet/socket set
- Basic wrench set
- Breaker bar. 3/4 inch is fine, or whatever fits your sockets
- PB blaster or other penetrating lubricant
- Brake Bleeder wrench, or other wrench the size of the bleeder (10mm).
- Tin snips
- Safety Glasses
- Respirator rated for lead (when working on brake pad parts it is smart so you do not breathe in lead dust)
- Rubber Mallet
- 2x – Jack Stand
- Car Jack
Optional:
- Nissan 350z Factory Service Manual
- Torque Wrench
- Brake Cleaner
- Disk Brake Quiet
- Wire brush
- Brake Service Kit – You may need this to push the brake piston back into the Brembo caliper if they are not already compressed
- Motive Power Bleeder (Or other bleeder system, but if you are bleeding fluids often, these are excellent investments)
Parts needed:
- 2x – Front Brembo Rotor (I recommend Centric blanks, or Disk Brake Australia brand)
- 2x – Rear Brembo Rotor
- 2x – Front Brembo Brake Pad (I like Hawk or Carbotech, this highly dependent on your needs)
- 2x – Rear Brembo Brake Pad
- 3x – Brake Fluid (I recommend Motul RBF-600)
- 2x – Front stainless steel brake lines for Brembo (I recommend Technafit. NOTE: you may as well upgrade your OEM rubber lines now. If you already have stainless steel brakes lines for your OEM brakes you CAN get a new banjo bolt from the brake line manufacturer made for the Brembo calipers and still use those lines.)
- 2x – Rear stainlsess steel brakes lines (NOTE: You can also get new banjo bolts for these if you already have them for the OEM brake kit to fit the Brembo caliper)
- 4x – Rear caliper bolts for Brembo calipers – Nissan Part #: 080412351A (The rear calipers require new bolts as they are different sizes. The front are the same size)
Process:
- Loosen lug nuts and jack up the front or rear of the car and place on two jack stands with the jack securing another point for safety.
- Remove wheels.
- Now is a good time to remove the OEM brake lines if you are replacing them. Careful to wipe up any brake fluid as it is very corrosive to painted surfaces. You will see one end connected to the caliper and the other on the inner wheel well. See below.

- You will see behind the OEM calipers there are two bolts that attach them to the wheel hub. Hit these with some PB Blaster and let soak for a few minutes. This is also where the breaker bar comes in handy, these can be a bear to remove. See picture below for the two bolt holes where the caliper attached.

- Remove calipers.
- Hit the exposed rotors with the rubber mallet at 12 o’clock, then 6, then 9 and 3 o’clock to knock them loose and they should slide right off the wheel studs.
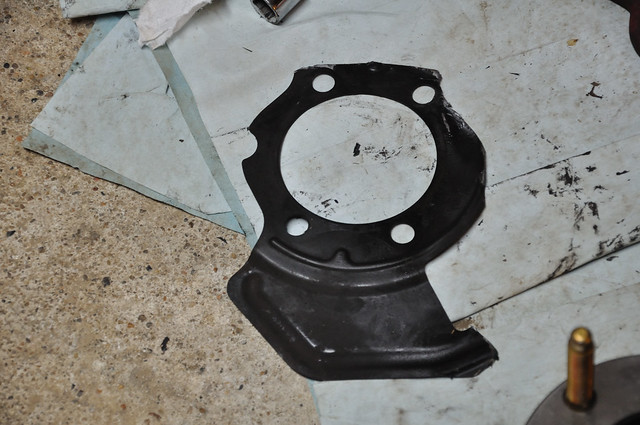
- Now you will need to use the tin snips to cut back the dust shield as small as possible. This will allow you to install the much bigger rotors of the Brembo kit. See picture below to see how much I took off.

- Use your wire brush to clean off the hub surface that the new rotor will sit against. Not a bad idea to hit this with some high temp silicon lube if you have it so the rotor will never rust against the hub.
- Install your new brake pads into the Brembo Caliper and use the Disk Brake Quiet on the back of the pads if you want them quiet. If the pistons of the caliper are not compressed you may have to use your brake service kit here.
- Install the new rotor, then the Brembo caliper exactly in reverse of how you took off the OEM calipers. Torque everything down tight. Refer to Factory Service Manual for exact numbers.
- Hook up your new brake line to the Brembo caliper. NOTE: Be sure to be gentle connecting the line to the rotor, do not over torque (15ft/lbs or so). Refer to Factory Service Manual.
- Do the same for the front or rear depending on where you started. The process is exactly the same!

- Brake fluid flush/bleeding time. I may do a tutorial on how to bleed with the Motive bleeder, but for this post I will link to a video of both how to bleed with the Motive bleeder, as well as traditional. NOTE: The front Brembo calipers have TWO bleeders and you will want to bleed from both.
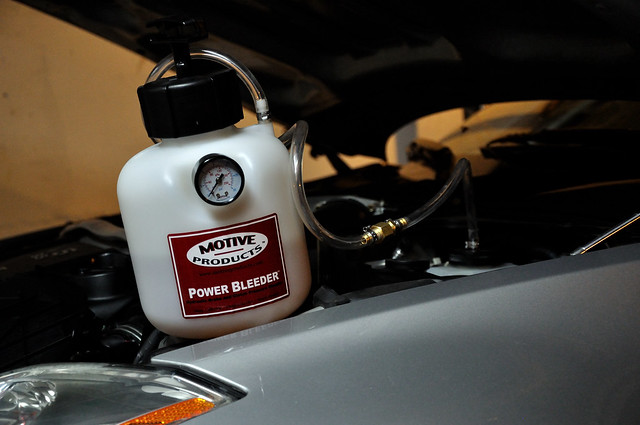

Video with Motive bleeder:
Traditional bleeding:
- That is it! Now time to take the car for a test drive around the block giving it a few good stops and then check for leaks. Next you will need to make some time to a proper brake pad “bed in.”
Enjoy your new non-fading stopping power and great looks!

You may also like
 How to install 350z Nismo/Stoptech front brake caliper kit – 41001-FR350
 How To: Custom 350z engine oil cooler install
 Motorsports Park Hastings with NASA Central Region
 NASA Provisional Racing License Holder
 2016 Texas Summer Shootout at Hallett Motor Racing Circuit
 4/9/2016 – Gateway Motorsports Park – NASA Central Time Trials