

We’ve done a little shake-up with breakfast over the past two weeks. My sourdough starter, “Kenny” (v2) was slowly starting to degrade, so I wanted to make one more batch of bread with him before completely starting over. I’m bummed, but I can’t seem to figure out what his issue was. More on that after the recipe.
So with this being his last batch of bread, I decided to go big and try making sourdough English muffins for the first time. I was intrigued because I read the dough was different from other breads, and I love English muffins and had the blessing of my nutritionist to consume a few more carbs. Plus, I’ve never had homemade English muffins — so I wanted to know how they differed from store-bought.
Aside from curiosity, there are a lot of reasons to make these yourself. You save money while being able to control the quality of your ingredients. There’s also no scary ingredients, things you’d rather not eat — like calcium sulfate, or even high fructose corn syrup. There’s also that pride and bragging right that comes with not only maintaining a starter but baking your own bread. I’m serious, it’s real.
- ½ cup active 100% hydration starter, recently fed and very bubbly
- 1 cup water
- 2 cups bread flour to make dough + 1 cup after rise to prepare for baking
- 2 tablespoons olive oil
- ½ teaspoons baking soda
- ½ teaspoons salt
- 2 tablespoons coconut sugar
- ¾-1 cup cornmeal, semolina or farina
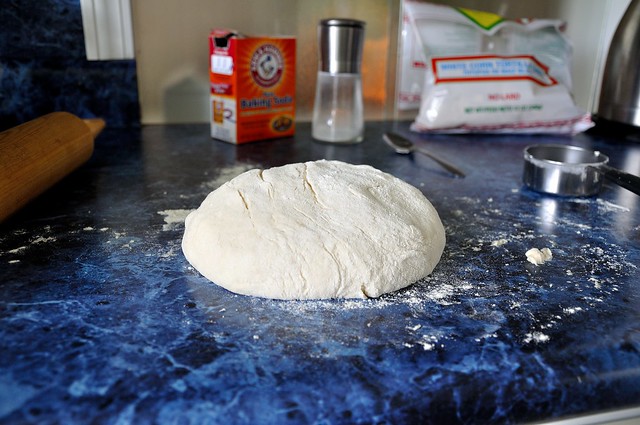
- The day before you want to bake, mix together the starter and the water. Once the starter is dissolved, add 2 cups of bread flour, and mix completely. It will net a very sticky dough. Add oil lightly over the top, cover and allow to sit overnight (7-10 hours).
- By morning (or 7-10 hours) the dough will have risen and be very bubbly. Stir in baking soda, salt, and sugar. Stir vigorously.
- Incrementally (very slowly) add the remaining cup of flower, continuing to stir (it will be difficult). The dough should lose its stickiness. If it doesn't, stir in a little additional flour.
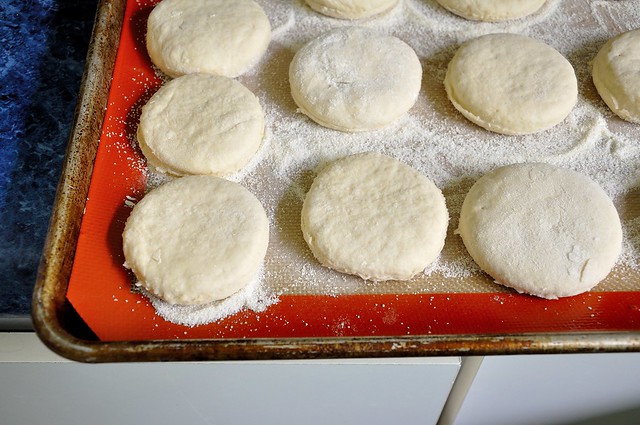
- Turn dough out onto a floured surface, roll it out to about ½″ thick, and cut into rounds with a floured cutter (I used a jar lid).
- Transfer each round to a baking sheet covered in cornmeal immediately after cutting it out, and coat each side with cornmeal (or alternative). Take caution they are well coated and not touching, otherwise the edges of the cut dough will stick back together again. Cover with a tea towel, and let rest for about 45 minutes, until they get puffy.
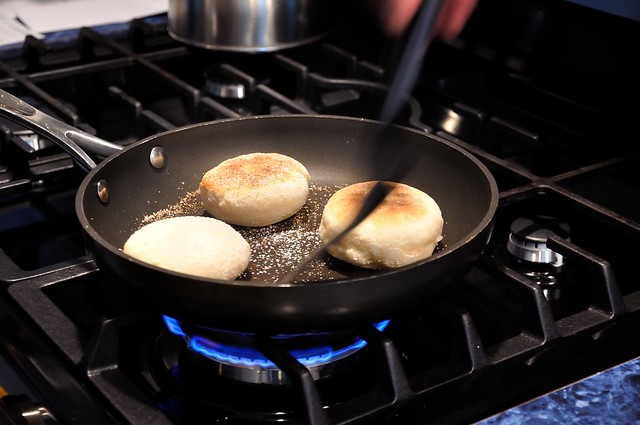
- Preheat a non-stick frying pan over medium-high heat until very hot, then reduce heat to medium. Cooking 3-4 at a time, cook the English muffins on each side for about 5 minutes, until they are look tightly puffy, dry around the edges, and medium golden brown on the bottom.
- Transfer to a wire rack and cool completely before storing in an airtight container.
The dough was definitely different. Much more soft/delicate and boy was it sticky. Cornmeal is your savior to keep it from sticking to everything. I also ended up using coconut oil on my hands to keep it off of me. The cost for each was around $.50 per muffin, and that’s with quality ingredients.
So back to Kenny. As the weather started getting warmer, he began developing a thin layer of water on top within 6 hours of feeding/cycling. It was abnormal, especially so soon after a feeding. I did a couple extra feedings thinking he would turn around, but it didn’t work. Even though I was fairly certain I was starting over after this batch of English muffins, I decided to do a few more feedings — one last chance. A day after the English muffins, the water had not only returned, but had completely turned black. While I wasn’t worried about the muffins I’d just made, I knew he was done, and disposed of him down the sink.
I can only figure that something environmental had a role to play in his death. So I’m going to wait a few weeks and start again with a new starter. The kitchen feels so weird without him living on the counter, that I’m sure it won’t be long.


Hunny, Kenny wasn’t dying!!! The liquid no matter what color it is…is called hooch. It is just a byproduct of the good bacteria eating the sugars and gluten in the flour. You started to see this during the warmer weather because warmth makes the fermentation process happen quicker. The hooch is not dangerous! You can just pour it down the sink, as some people say it makes your starter more sour, or you can just mix it back in. I usually pour it off just because I need every advantage in getting my kids to eat the baked goods. lol If you want to slow this process down and also not have to feed Kenny everyday, store him in the fridge like I do. You only have to feed him once a week that way. A couple of days before you want to use him, feed him like you normally would and get him nice and active. The day you are going to use him leave him out of the fridge for a few hours. This should help! 🙂 By the way, I am going to try you cinnamon raisin sour dough this week!! I’m excited!!