
So we did it! After our last trial, we received some helpful comments and suggestions that led us to believe we weren’t going as full-force with our technique as we could go. We apparently needed to be more hardcore, and maybe a little dangerous?
Because the government shutdown was averted at the 11th hour, my dad didn’t get to come to town. We decided to freeze the dough to preserve it in the meantime, and ended up pulling it out Sunday afternoon because we were already jonesing for bread and cheese.
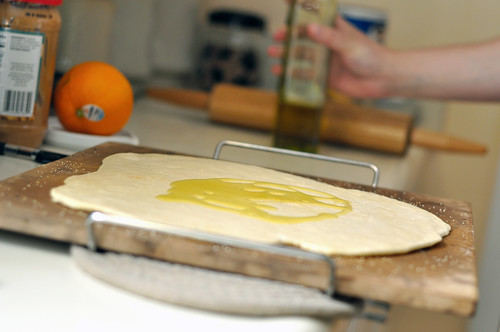
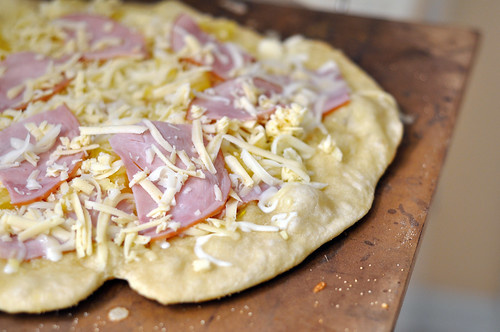
We immediately noticed a benefit to freezing the dough. After leaving it on the counter for 30-45 minutes, we started rolling it out, and were able to get it much thinner than previous trial versions. Being cold gave it a comparative texture/consistency to play dough. It was firm and not as easily torn as room-temperature dough.
We also made a change in the way of our oven configuration. We set the rack as close as we could to the oven coils, placed our pizza stone, and cranked the temperature as high as it would go, slowly heating it, and getting it much hotter than we were having the rack higher just two rungs higher. The disadvantage is that the rack was literally right over the coil and created precarious situation in trying to remove the stone to place our pizza. Luckily our stone came with it’s own rack with handles. Without it, I would use extreme caution in trying this out. We still managed to scorch one of our oven mitts.
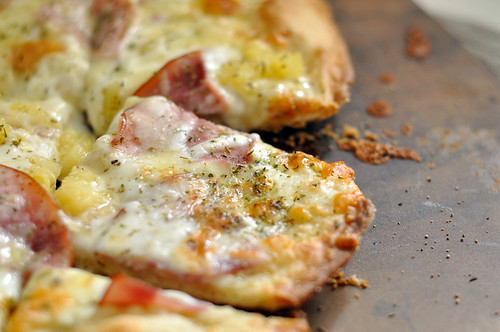
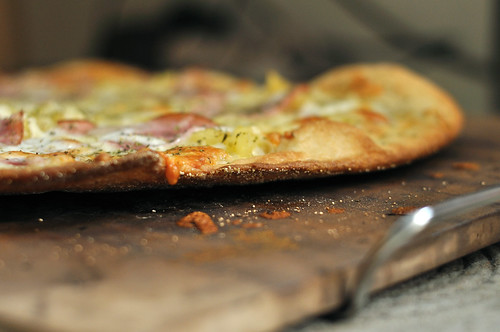
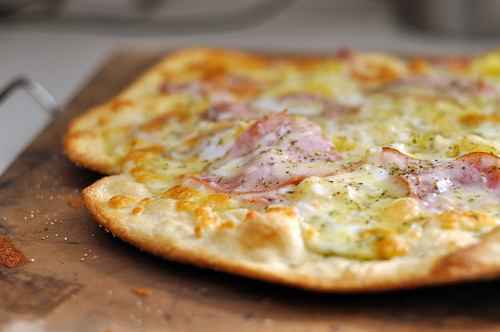
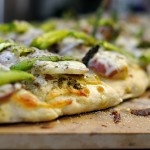
We did the pre-bake (around 4-5 minutes). We saw some bubbles forming in the dough and Neil easily popped them with a fork. The crust was lightly golden after the pre-bake, but as you can see from the photo above, a completely different composition and texture than our previous crusts. Instead of being dense, it’s light and almost transparent. The dough was beginning to separate into layers, and had a really good airy center. We layered our toppings and popped it back in the oven for around 10 minutes.
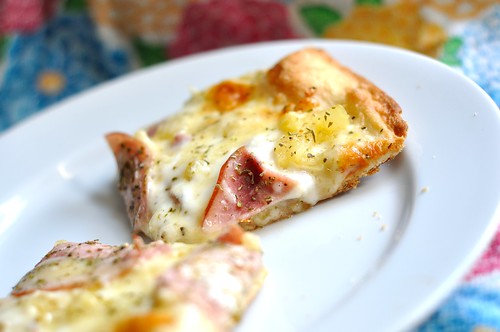
I believe Charlie Sheen said it best,… “WINNING!”
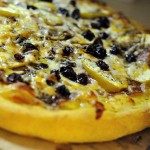
Not perfectly round, but that’s a challenge for another day. Besides, when are restaurant pizzas ever perfectly round? Either way, we have our winner. I’d still like to do a side-by-side comparison of our flatbread crust done in this method and this recipe. For now, here is the full recipe for this crust, all you need are your toppings:
Ingredients:
(makes crust for 2 pizzas):
1 package active dry yeast
2 teaspoons sugar
1 cup warm water (110 degrees F)
2 tablespoons vegetable shortening
2 to 3 cups all-purpose flour
2 teaspoons salt
4 tablespoons olive oil
2 cloves garlic
Additional toppings according to preference. (Need some ideas? How about this? or this? or maybe now that it’s grilling season you’d like this!)
Directions:
To Prepare Dough:
1. In a mixer/mixing bowl, combine the yeast, sugar, water and shortening to form a paste.
2. Add the flour and salt and mix while stirring (either by hand or mixer). If you are using a mixer, mix for 1-2 minutes before switching to the dough hook and mixing for an additional 3 minutes (adding more water if dry). If mixing by hand, mix in bowl to combine before turning out onto a floured surface (using 1-2 tablespoons) and kneading for an additional 6-8 minutes.
3. Place dough in a lightly oiled bowl and cover with a towel. Set aside to rise in the warmest part of the kitchen for 45 minutes. After 45 minutes, cut the risen dough into 2 equal pieces (or 1 big one!) and knead each portion into a round. Cover again and let rise for 15 to 20 minutes.
4. Place dough in a freezer safe bag or container and freeze for 2-3 days. Note: There is no tested science in the timing. I’m sure you can freeze it for less or more time as needed, this is purely what worked beautifully for us.
To Assemble Pizza:
1.Remove dough from freezer and allow to thaw for 45 minutes-1 hour before using. The dough still being somewhat cool allowed it hold shape and be rolled/shaped thinly — this is key.
2. Preheat the oven to 450-475 degrees F. Place oven rack on the lowest possible rung and place pizza stone on it. Once the oven is preheated, carefully remove the stone using oven mitts and place on a safe surface. It will be VERY hot.
3. Sprinkle pizza stone with cornmeal. Roll and stretch dough into a round or long strip (1 large, or 2 smaller) and transfer to sheet/stone. Mix 1-2 tablespoons of olive oil with pressed garlic and brush garlic oil over the dough.
4. Place in oven and pre-bake empty crust for 4-5 minutes.
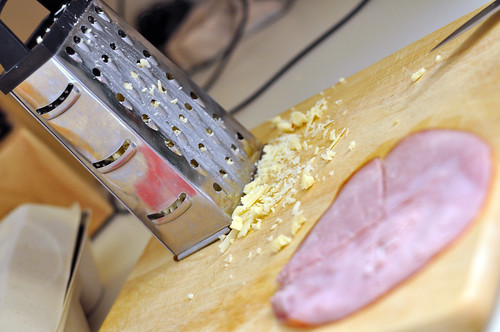
5. Layer your toppings and return pizza to oven.
6. Bake pizza until lightly browned, around 10-12 minutes. Cool for 2-3 minutes before cutting pizza into pieces and serving.
Note: Typically I’d include the use of other pizza pans or baking sheets in the directions. We have not been able to duplicate our success on other bakeware, therefore we can only advocate the use of a pizza stone at this time. To be honest, a pizza stone really is the best if you can’t use a grill or real-deal fancy brick oven.
Like many, I took up cooking to take my life less seriously. In all the “real-life” tornado of career, freelance, grad school, certifications and where to go next and how to build our smallish-time empire, it’s nice to have something you can sort of mockingly take seriously. My obsession with pizza crust as of late may seem silly, but having little things to get excited or feel accomplished about is so important to balance out the more serious and long-term adult goals. Since I’ve been working full-time AND going t0 school at least full- or part-time since High School, I feel like I haven’t yet had the opportunity (read: time) to develop or foster any real hobbies or “me” stuff. I hope to change that once this degree is done!
You may also like


Just added this to my “to make” file … it looks delicious!
If you put the unbaked pizzas on an upside-down baking sheet that has some cornmeal on it, you should be able to just shimmy the pizza off the sheet onto the stone without burning any oven mitts (or anything else), since you won’t have to move the hot stone out of the oven. It might not work out perfectly the first time you try it though, just a warning!
Good tip, we’ll have to try that! That or I’m going to buy a restaurant style spatula for pizzas…
Claire’s Cornmeal idea is great, that’s typically what I do to keep the crust from sticking.
To get the nice round shape, most restaurants have a roller that you drop the dough balls into from two different directions, then from there the cook will stretch the dough then toss it to get the shape. Basically the centrifugal force of tossing is how it gets the nice round shape….just FYI! 🙂
you can roll dough out turn a pizza pan upside down on dough and roll a pizza cutter around pan walla you have a perfectly round pizza
That’s a great idea!
Mmmm…those pizzas look lovely and crisp. For some reason they look like a naughty breakfast to me. Perhaps I see yellow and pink colours together and immediately associate the combination with breakfast.
Well if you’re like us, pizza is perfect fodder for breakfast!
My boyfriend made this last night for dinner. We don’t have a pizza stone and instead used to normal baking sheets. The pizza was the best we’ve ever made at home, so I think it can be done successfully without a baking stone.
I think it definitely can too, just cook it right near the coil. We’ve even gone so far as to place the dough on foil, which is really the closest we can get to just putting it on the rack itself, which I won’t do because of the potential mess/smell factor.
made this tonight and it turned out AMAZING! One question though, how is the paste made in the first step? I ended up with shortening floating in the water that would not combine. Help!
I should probably rewrite that step to say that I had the mixture going the whole time and added the water/yeast to the shortening rather than the shortening to the water/yeast. I hope that helps!
I can’t wait to try this….love thin crust…I have found that precutting peppers help keep the pizza from getting soggy. We don’t own a pizza stone either, but might have to get one. We just stick it right on the racks…and use a thin cookie sheet as a big spatula, it works great!
Instead of spending a lot of money for a pizza stone..try this!
Buy clay or shale quarry tiles at almost any home improvement store….. (be sure to get the unglazed, as the glazing contains lead). Purchased 9 (so I have an extra few) 6 x 6 tiles
at 1/2 inch thick… place in the bottom and lowest rack of your oven.
they work just as well and at a fraction of the cost….(I paid 44 cents for each one)!
Note: Do not wash with soap (just use water and be sure to dry completely
before you put them in the oven or they will crack. Turn the oven on as high as it will go and let it preheat for at least half an hour before you place your crust on the tiles sprinkled with corn meal.
Will the dough really defrost in one hour? I would think that coming out of the freezer, it would be as hard as a rock.
Another crispy secret is throwing salt on your stone (or cookie sheet) before baking. The crust “swims” over the salt, and gives a flavor out of this world!
YES, SALT
If you were that concerned with being healthy, you would not be looking at pizza, dear.
Bill
Hi Bill! Thanks for your tip, I will definitely try that the next time I make pizza.
Re: Our diet. We take a pretty balanced and realistic approach to dieting. We are pretty keen on keeping our Paleo diet 80% of the time, but still enjoy our favorite foods the other 20%. We contribute this ratio to keeping our approach to eating sustainable, while still allowing us fun foods, social events, and plenty of flexibility when we travel. This is all to say that we feel we can be health conscious, but still have some fun. And I think we do a pretty good job.
Hi Jessica,
I’m new to making pizza dough, so I would to ask what is 2 to 3 cups of flour? Do I put 2 cups first to mix and see if it is too wet then I add in more flour?
It does, and that is what I do every single time despite this recipe being old hat. Are you using a stand mixer? I usually mix everything and then start to mix with the standard mixing attachment, then I switch to bread. If the dough is still sticky and stuck to the bowl, I add more flower, if it is too dry, and flaky, I add more water. Do either really slowly and conservatively, as a little of either go a long way.
Hi Jessica,
Thank you so much for your detailed reply! Really helpful! ^^
No problem. It was one of the first things I learned in breadmaking — the recipe gets you 95% there, the rest is instict, which you get over time.